BRIM's four curves and softness
What CLASSIC, PRO, HARD and RATIO do to a peak, what SOFTNESS changes on each of them, and how to read the TRANSFER drawing before you trust your ears.
What the curve decides
Every curve in BRIM agrees on one thing: nothing leaves the clipper above the clip level. Where they differ is what happens on the way there. The curve decides whether the signal runs straight into the clip level and stops, or bends over before it gets there, and whether the quieter part of the signal underneath gets lifted.
That is why the four modes sound different even when the CLIPPED reading is almost the same. The amount of peak taken off is decided mostly by how hard you drive; the curve decides what the corner of the cut is made of.
Choosing a curve
Set the drive first
Raise GAIN in the INPUT panel until the pink tops in the history show roughly the amount of clipping you are after. Choosing a curve before that is choosing on material that is not reaching it.
Start on HARD and listen to the edge
HARD is the reference: a straight line up to the clip level and flat after it. It is the brightest and most direct of the four. If HARD already sounds right, you are done, because softness does nothing on it.
Raise SOFTNESS on another curve
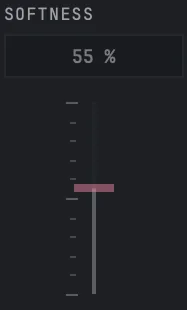
Click CLASSIC, PRO or RATIO and raise SOFTNESS from 0 %. At 0 % all three cut exactly like HARD, so the difference only appears as the slider comes up. The TRANSFER drawing beside the cells redraws the curve as you move it.
Match the level before you compare
PRO and RATIO lift everything under their knee by 12 dB times the softness: 6 dB at 50 %, 12 dB at 100 %. A curve that plays louder will sound better for that reason alone, so bring OUTPUT GAIN down until the level matches before you decide. The factory presets have this done for you.
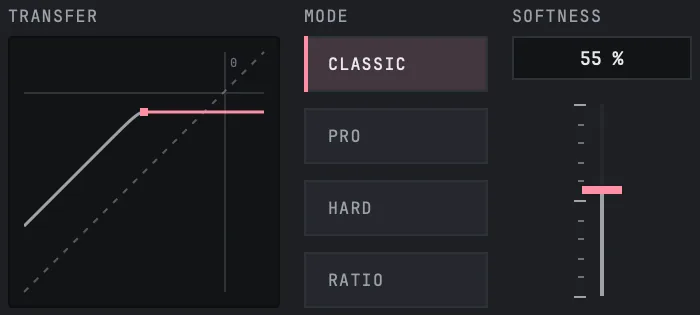
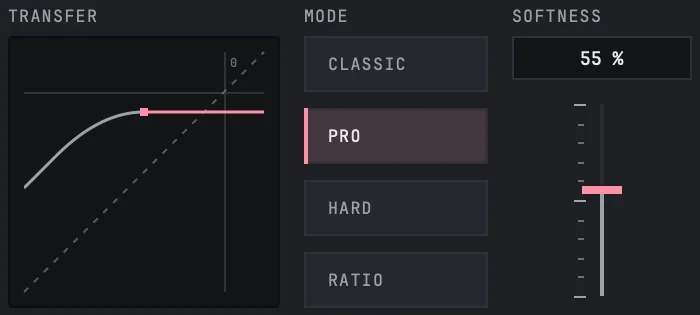
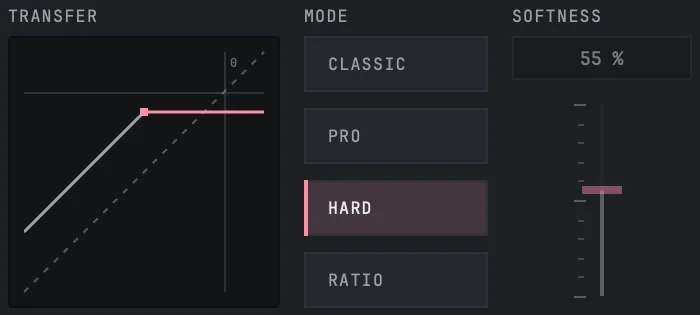
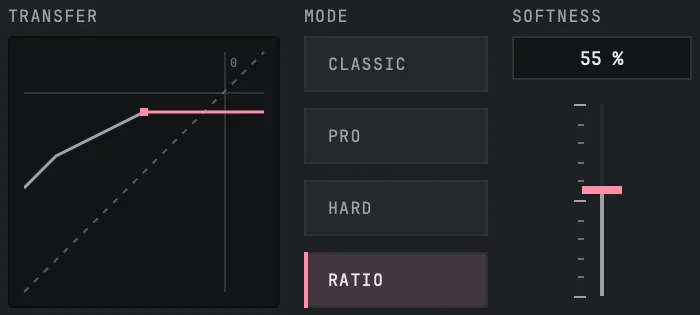
The four curves
HARD cuts the peak at the clip level and leaves everything under it untouched. It ignores softness completely, which is why the slider dims while it is lit.
PRO adds 12 dB times the softness to everything under its knee, and the knee starts further below the clip level the higher the softness goes: at 50 % it begins 12 dB under. From there the curve bends smoothly into the clip level, so there is no corner at all. It is the roundest of the four.
RATIO adds the same 12 dB times softness under its knee, then above the knee it rises at half the rate, one dB out for every two dB in, until it meets the clip level and stops. The corner you see in the drawing is where the first slope changes to the second.
CLASSIC changes the shape of the curve under the clip level as softness rises, and does it differently from PRO and RATIO. The TRANSFER drawing shows exactly what it does at the setting you are on, and that drawing is the honest answer to the question of how it differs.
Reading the history per curve
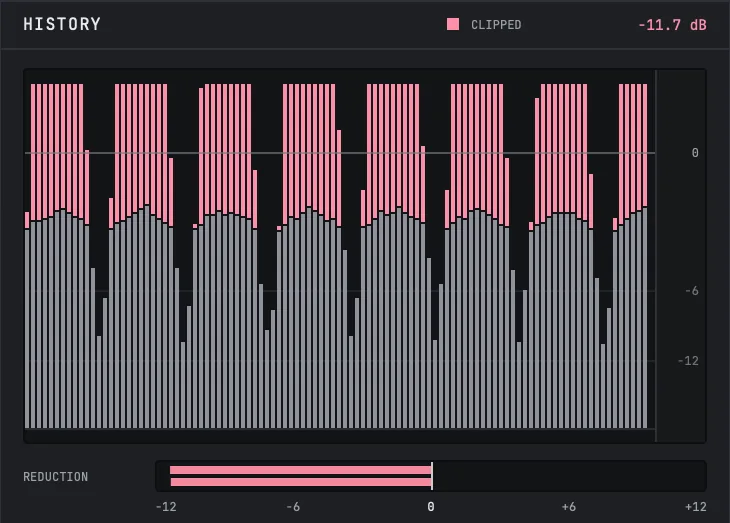
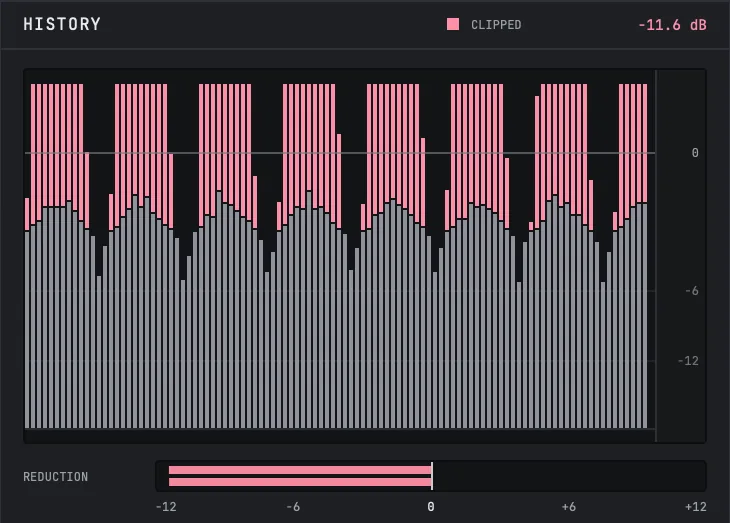
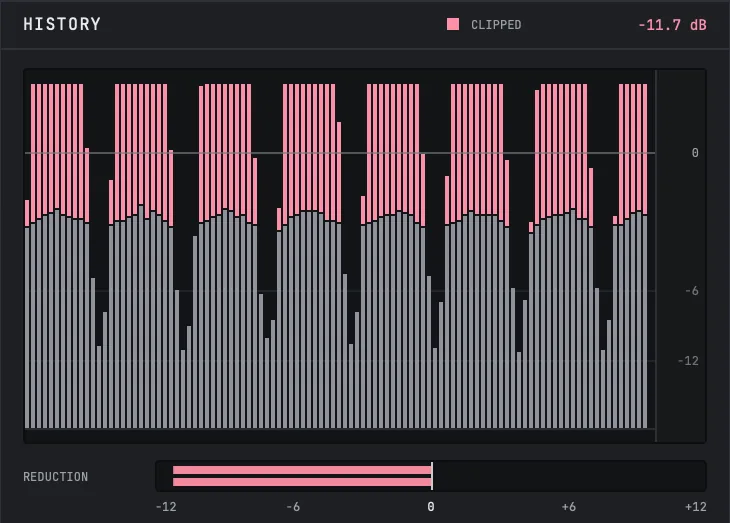
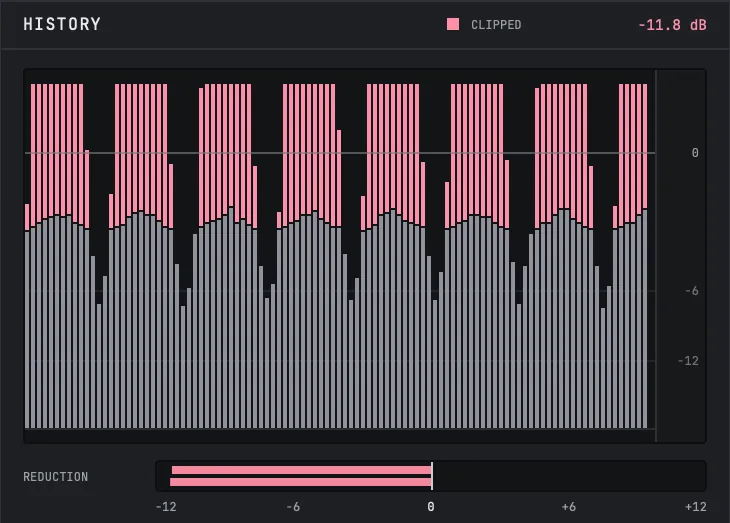
With the same drive and the same clip level, the CLIPPED reading barely moves between the curves: about 11.6 to 11.8 dB on the signal in these pictures. What moves is the grey body under the pink. On HARD and CLASSIC the body is flat topped. On PRO and RATIO it reaches higher and moves more, because those curves have lifted the quieter part of every hit towards the clip level.
Switching while the music plays
A change of curve crossfades the old one into the new one over 8 ms, so you can click between the four cells on a playing loop, or automate the mode, without a click. Softness is a curve setting too and follows the slider smoothly. What you hear while switching is the curve and nothing else.
Questions this page answers
- At softness 0 %, every curve is HARD. If the four cells sound the same, raise SOFTNESS.
- HARD ignores softness. The setting is kept, and comes back when you click another curve.
- PRO and RATIO make the material louder as softness rises. Compare at matched level.
- The curve does not change how far over the clip level a peak can go: nothing leaves the clipper above it on any curve. The oversampling filter after the clipper can rebuild a little of the cut edge, and the ceiling is what holds that.
- The mode is a published parameter, so you can automate it, and the switch is click free.
- PLOT SCALE in the settings menu changes the range of the TRANSFER drawing: -24 to 0 dB, -30 to +6 dB or -48 to +12 dB. It changes the picture, not the sound.
Still stuck?
Nothing here matching? Write to a person.